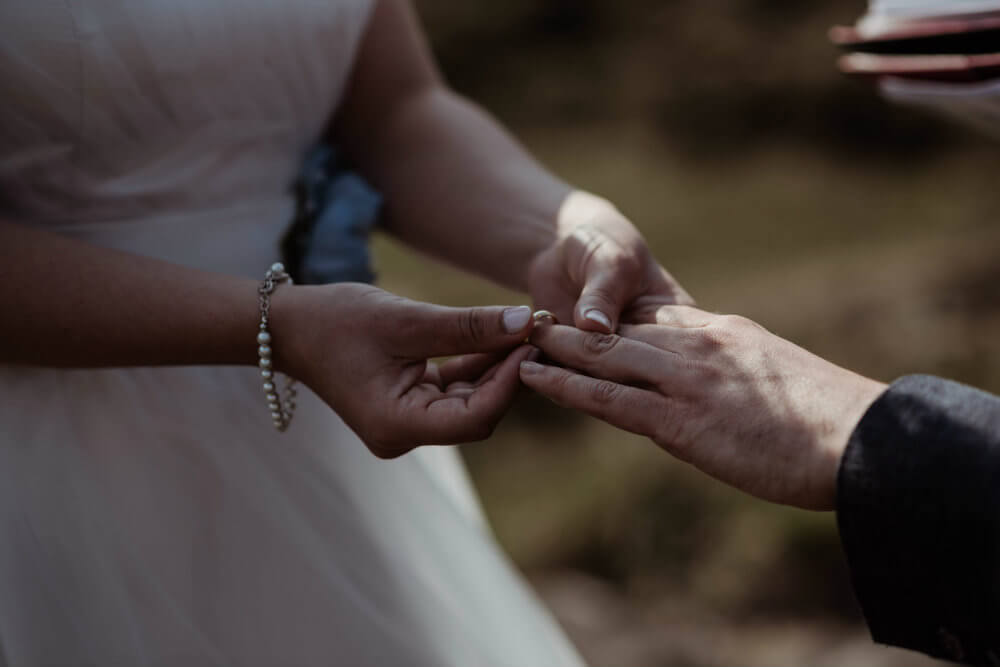
Making our own wedding rings was a fun and rewarding process. Not only did we end up with fabulously unique handmade rings, lovingly made by one another, but it was a fantastic way to spend time together as a couple in the lead up to the wedding (or in our case, our elopement).
You really don’t have to be an expert jeweller or even remotely crafty to make your own wedding rings, and it can be a cost-effective and ethical alternative to regular shop-bought rings.
In this post, I'm going to take you through our experience of making our own wedding rings, together with tips on how to find the best ring making workshop for you, and the potential pitfalls and hidden costs you might encounter.
Our 'Make Your Own Wedding Rings' Experience
On a snowy day in March, we drove the short distance to the little village of Wheathampstead, just outside St Albans, in Hertfordshire.
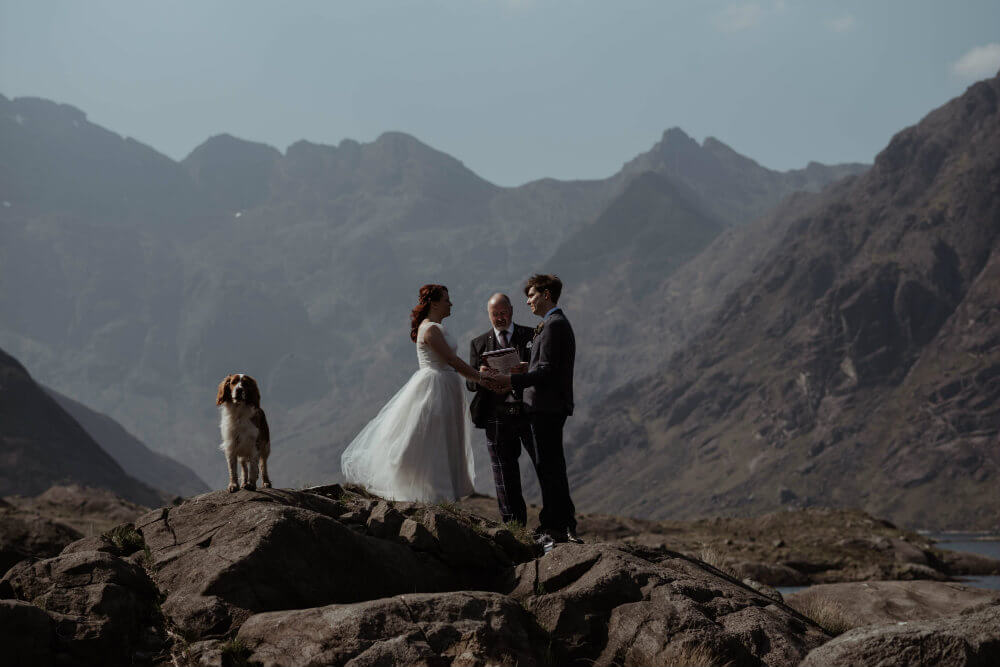
This was the day we were going to make our wedding rings, and it was a mere two months before our wedding (elopement) in the Isle of Skye, Scotland. The UK was experiencing a cold, snowy winter and more snow was threatening to fall. We were both excited at the prospect of making each other’s rings, as well as a little nervous about whether the wintry weather would get any worse. The potential for us becoming stranded in the village was a small, but realistic possibility.
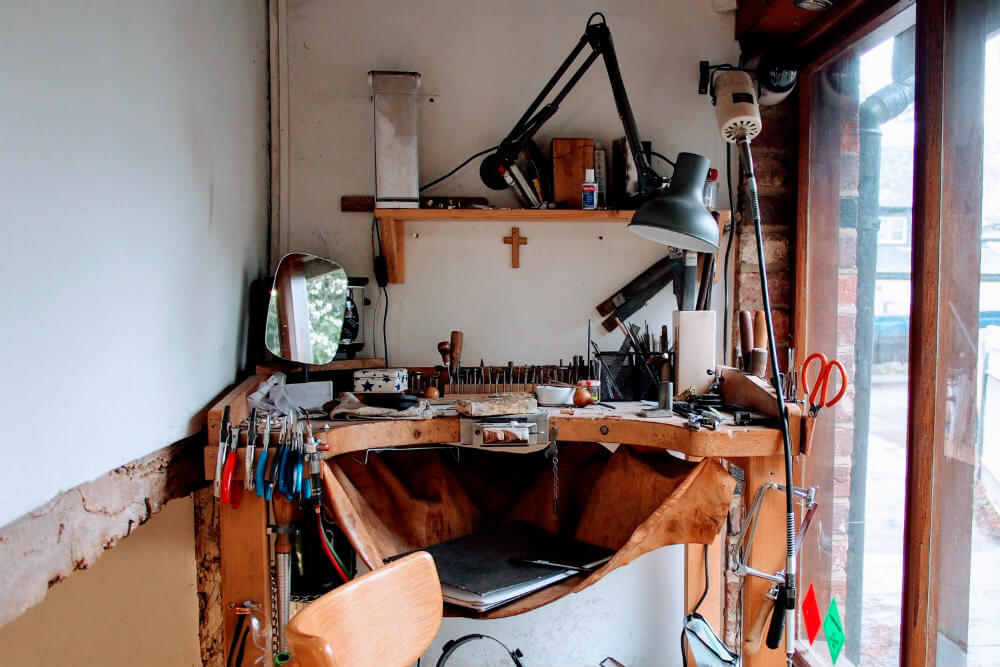
We arrived at the Rachel Jeffery Jewellery School to find out that the snow had actually caused a power cut and that they were working to get the lights back on. Despite the darkness, we took the opportunity to browse the handcrafted contemporary jewellery on display, wondering whether ours would turn out to be as beautiful.
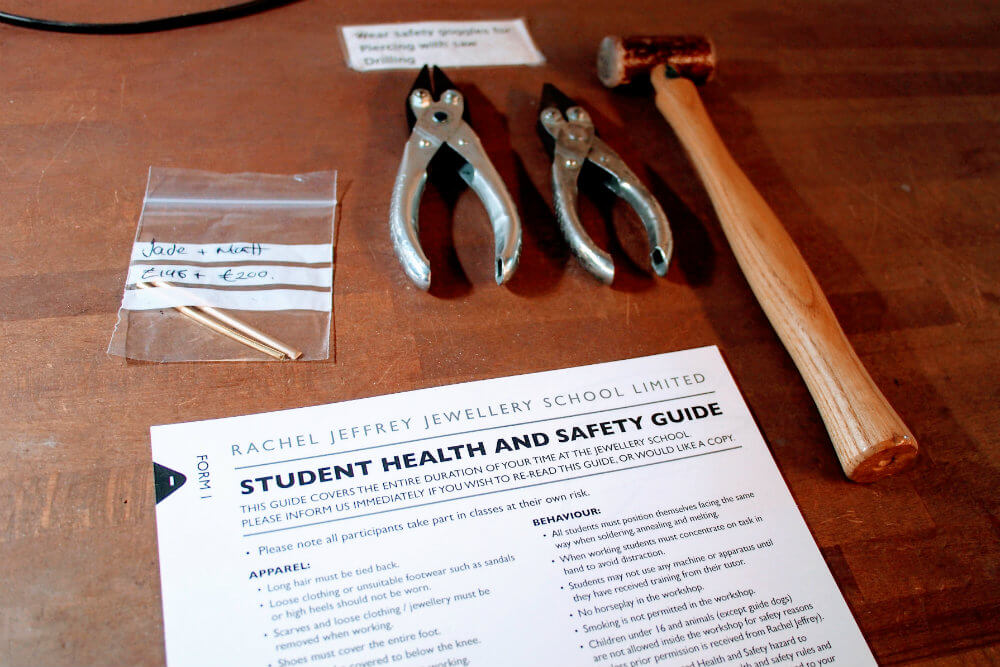
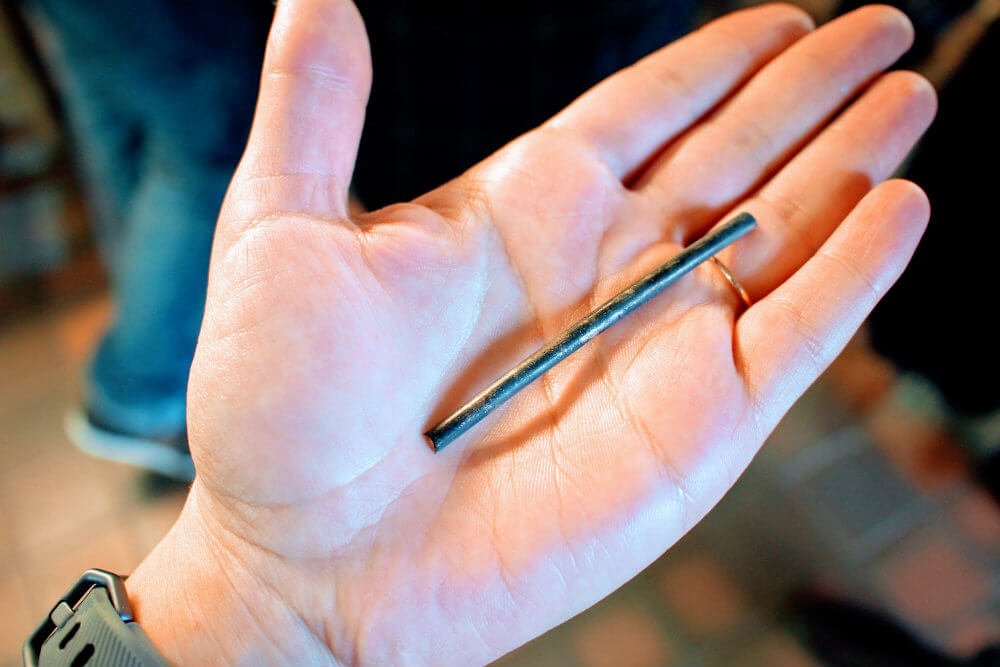
With power restored, we were presented with our ‘D shaped’ gold bars in a little bag - a 9ct gold bar would become Matt’s ring, and a more delicate 18ct gold would eventually become my wedding ring. We had chosen these materials a few weeks earlier at a consultation with Rachel. It was important for me to match my wedding band with my beautiful freshwater pearl engagement ring.
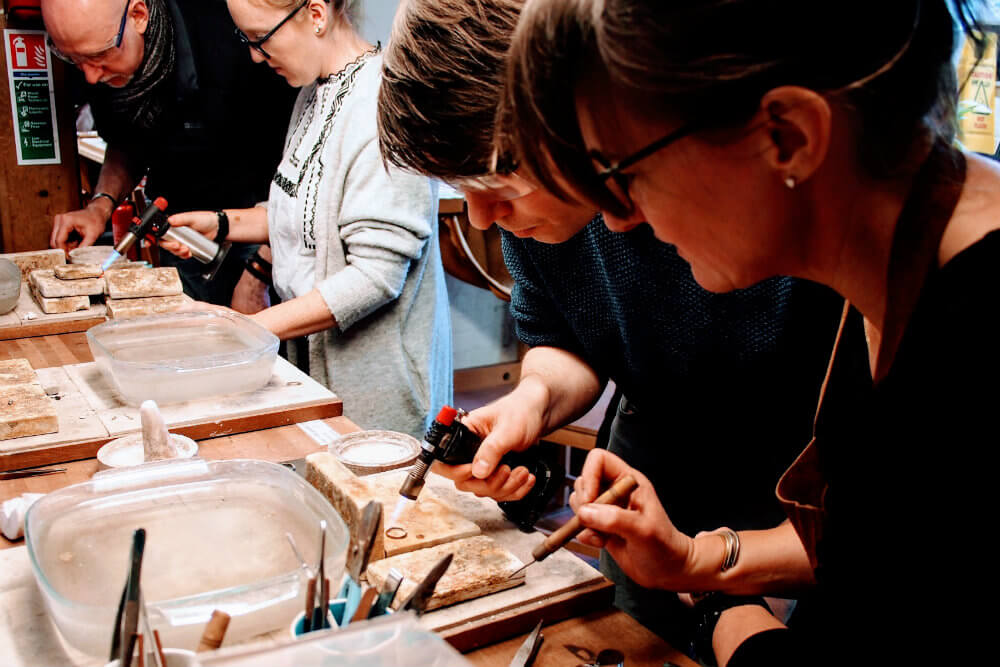
After being given the green light, we proceeded next door to the workshop along with Rachel and three other couples. In our group was a mother and daughter, and two other engaged couples looking to make their wedding rings too. Each individual appeared to be wanting to create different rings. Some were using silver, while others wanted a different finish or style. It didn't seem to be a problem for Rachel.
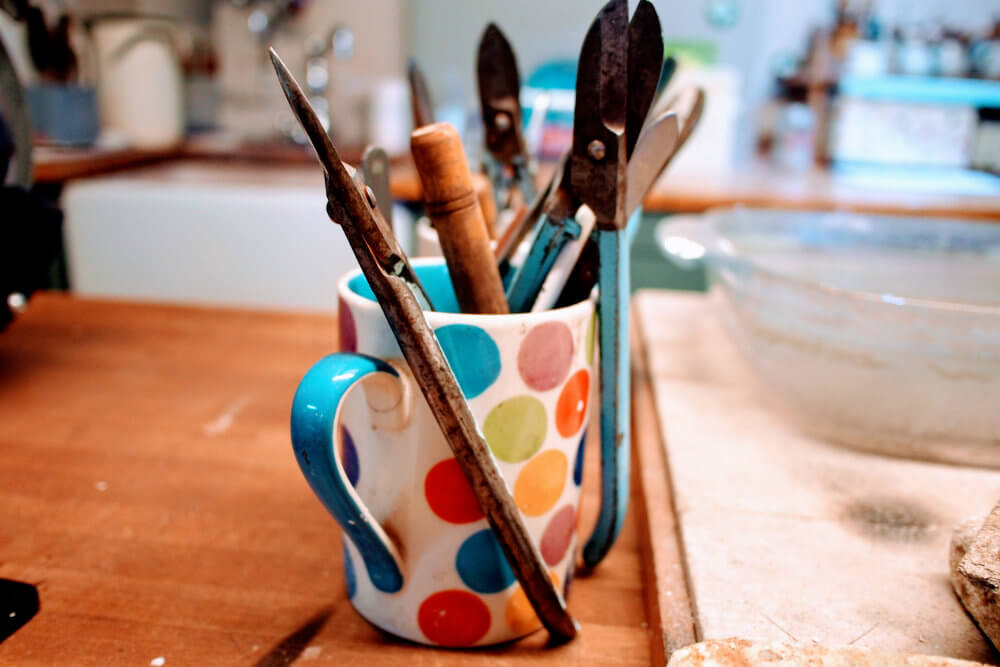
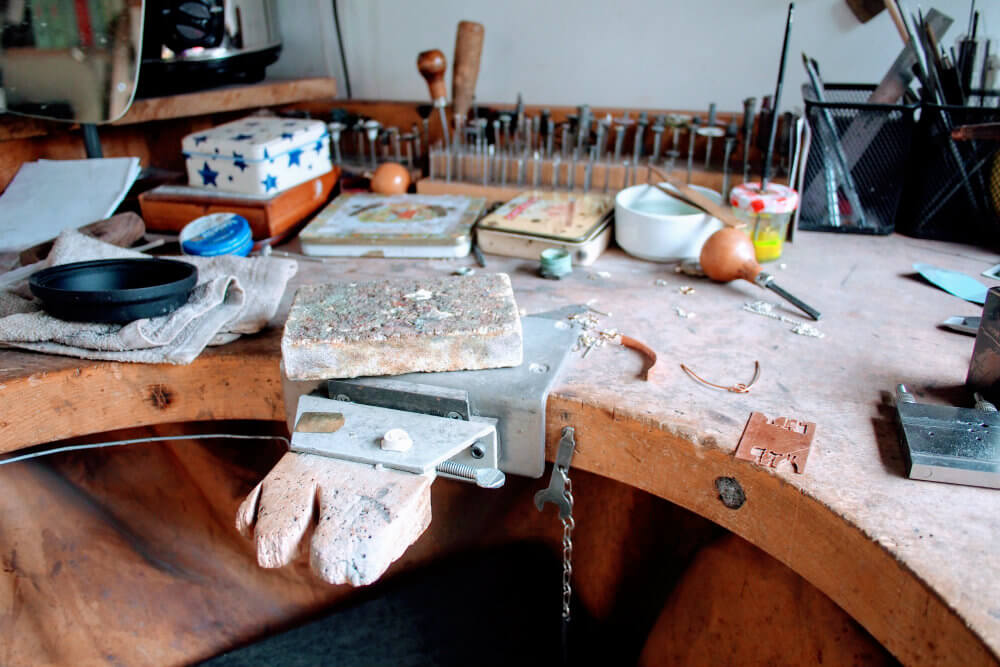
After going through the health and safety rules and donning our protective gear, we were each shown our workstations. Surrounded by tools and scary looking machinery, it all began to feel real and a little daunting! We need not have worried though as our instructors took us through the processes step by step, always on hand to check what we were doing and to give helpful advice.
The Process of Making Our Own Wedding Rings
Making a ring was less complex than we anticipated, but still required a high degree of precision. Here is a summary of the steps we went through.
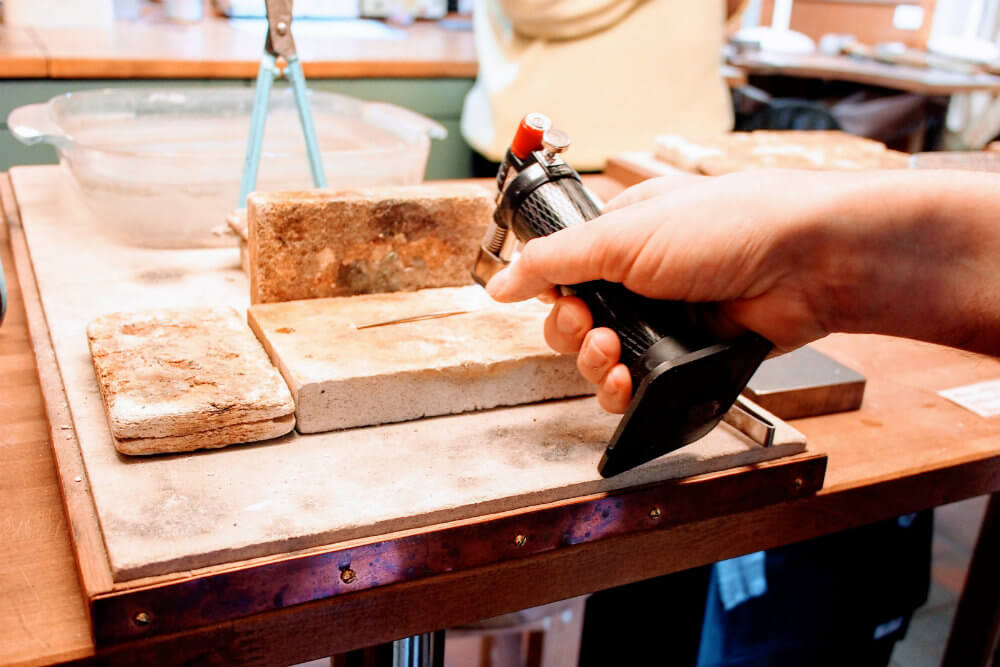
Step 1: Annealing
This involved warming up our metal bars with a blowtorch. Yes, I felt like an incredibly powerful badass as well as worried about whether I was doing it right. Even though I knew the gold bars were supposed to turn black, it’s still a little disconcerting when you see it happening. Heating the metal bars up causes them to become malleable which then allows them to be shaped.
After a short period of cooling, the gold bars were ready for the next step - hammer time!
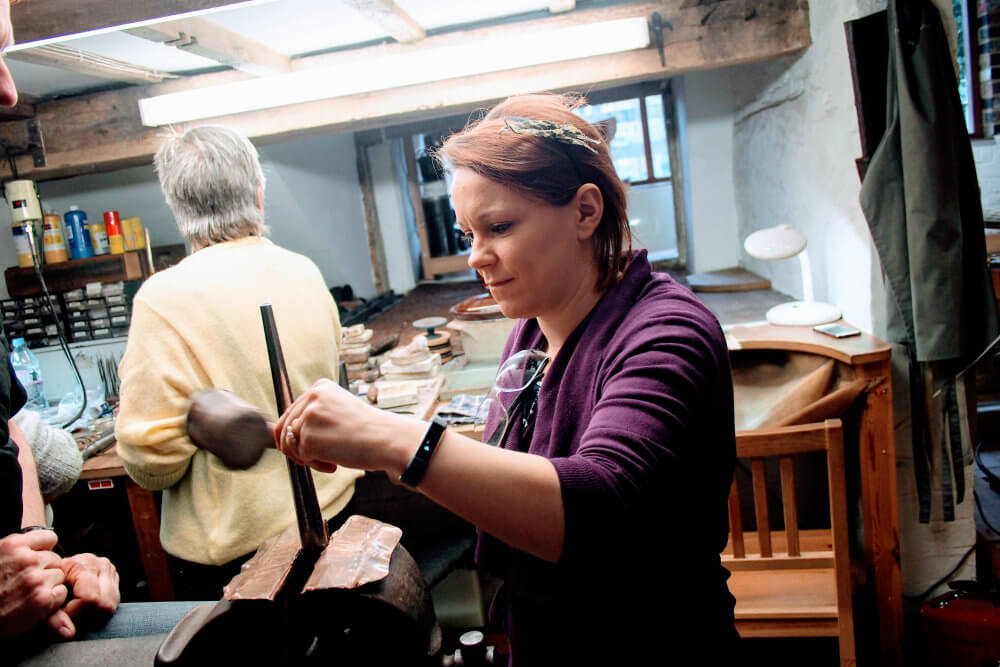
Step 2: Shaping
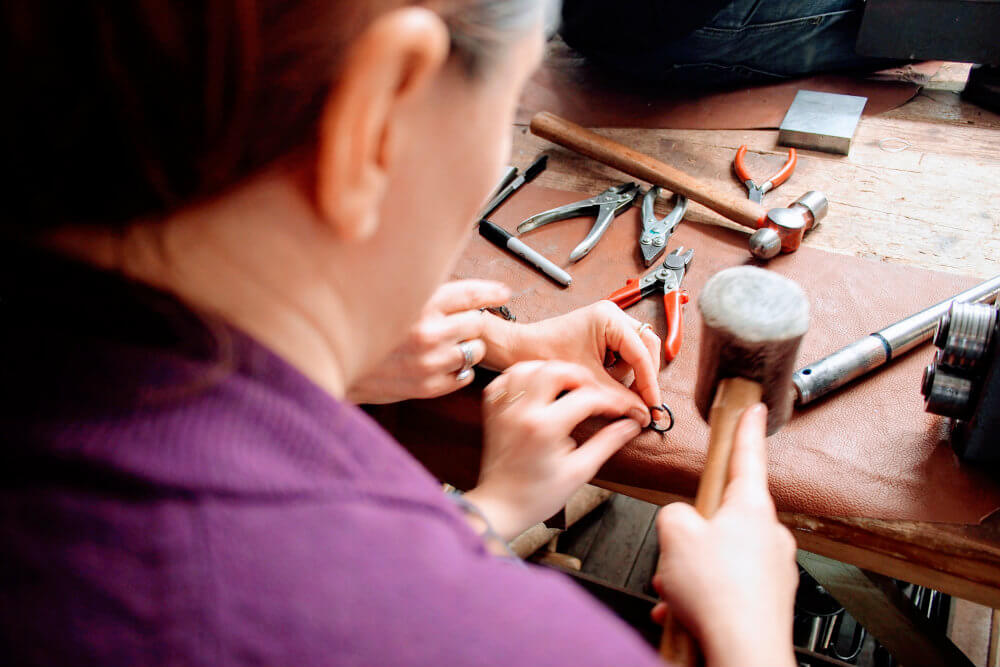
Shaping the ring involved taking our now black gold bars, holding them against a conical piece of metal and using a mallet to give them some good whacks! After a short period of hammering, you’ve made a basic ring shape.
To get the right fit, we simply tried them on. Then, more bashing. It meant we were ending up with rings that were properly made to measure!

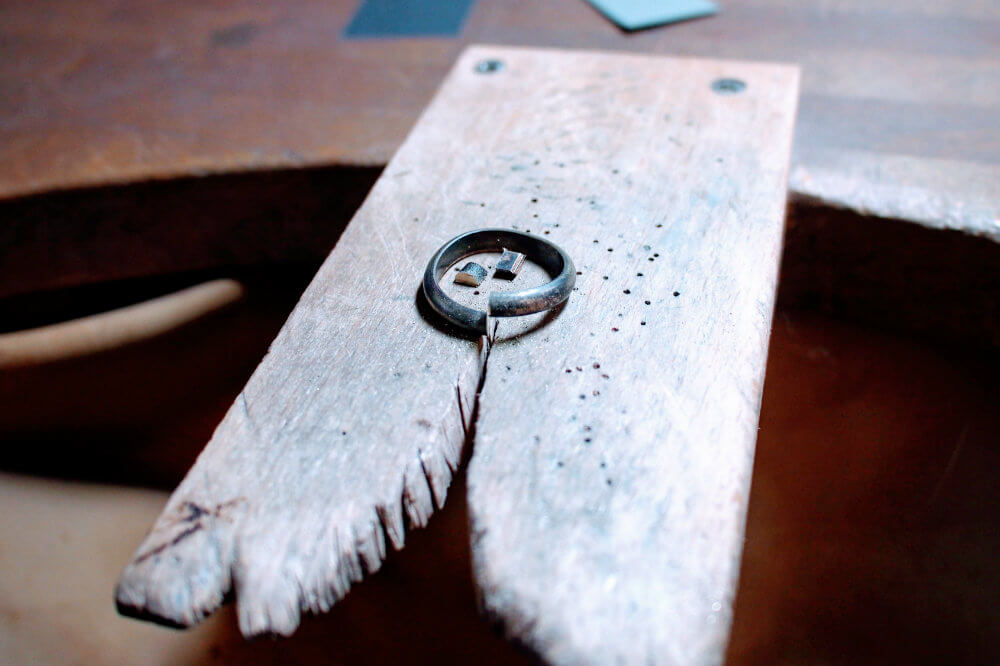

Step 3: Sawing Off The Excess
Next was a really scary bit - hacking away at the rings with saws to get rid of the excess overlap.
Thankfully we got to practice our sawing skills on a little piece of scrap metal before getting started on our own precious gold rings.
After carefully sawing away the excess, we then pushed the ends together with pliers and hammers.
Step 4: Soldering
After smoothing down the join in the ring with some sandpaper we were ready to solder the join together.
Tiny squares of gold were cut from a wafer thin sheet. Using tweezers and a paintbrush we carefully placed these tiny squares of gold over the join along with some white powder. Using a blowtorch for a second time, we hovered the hot flame over the join until the solder bubbled.
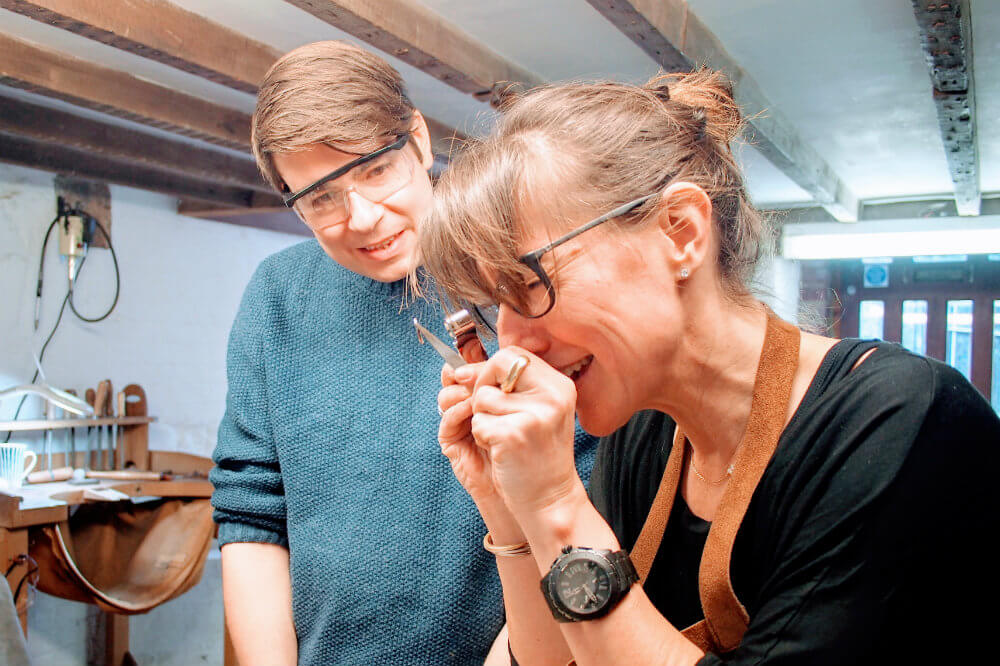
Rachel checked the joins of our rings with a magnifying glass to ensure the solder had adhered and seemed happy.
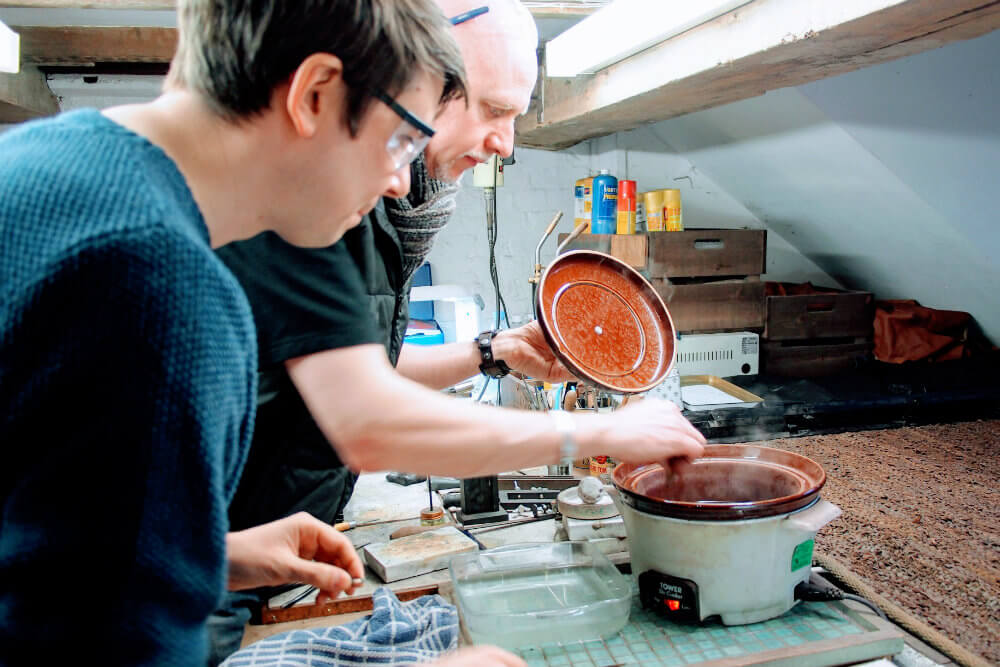
Step 5: Cleaning
Our rings were now ready for cleaning.
One by one, we placed our rings in a pickle pot (yes, a pickle pot!). The pot was filled with chemicals that would treat the metals and clean any blemishes. The process would take a while, so we set out into the snow for some lunch whilst the pickle pot did its thing.
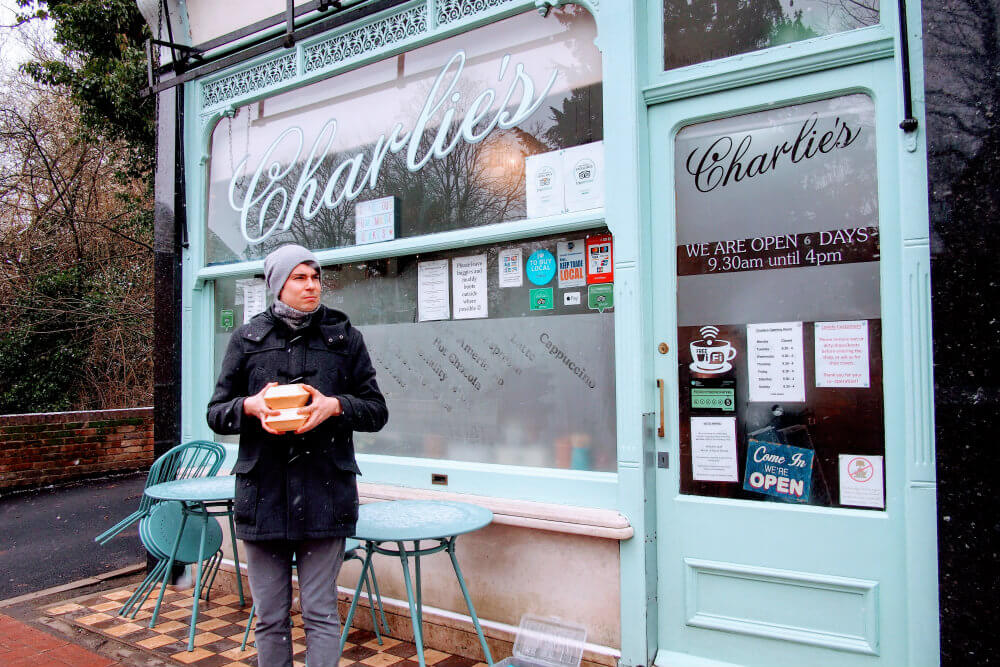
Lunch
Having visited the village a week or so before, we’d already scoped out local places to eat and so we rushed off to Charlie’s, a popular cafe, just in time to bag the last seat.
After a filling lunch and feeling relieved that the snow fall had not worsened, we strolled back to the jewellery workshop to finish making our wedding rings.
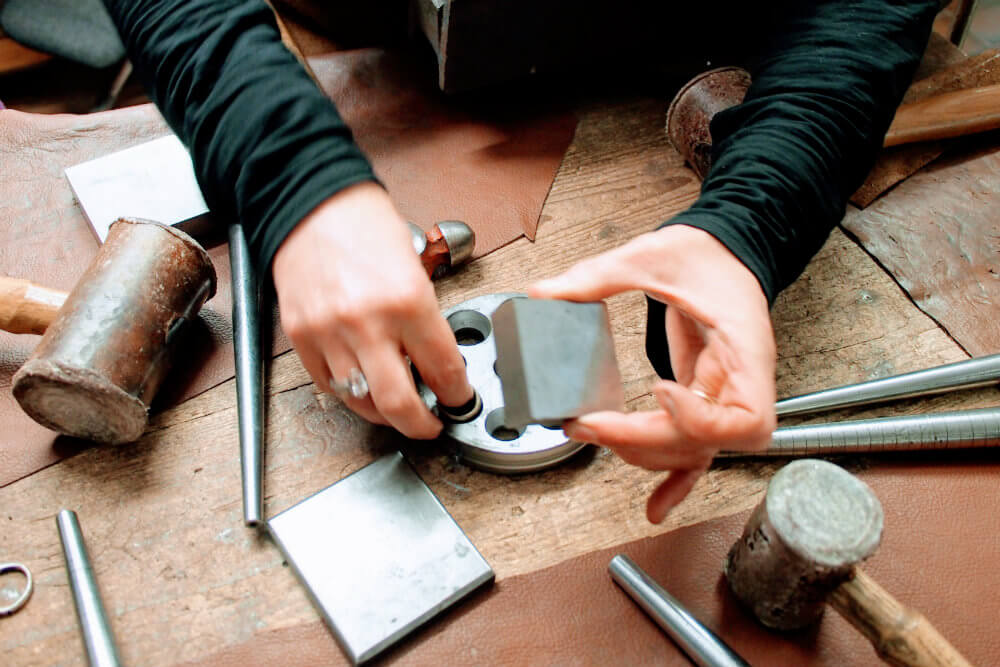
Step 6: Moulding
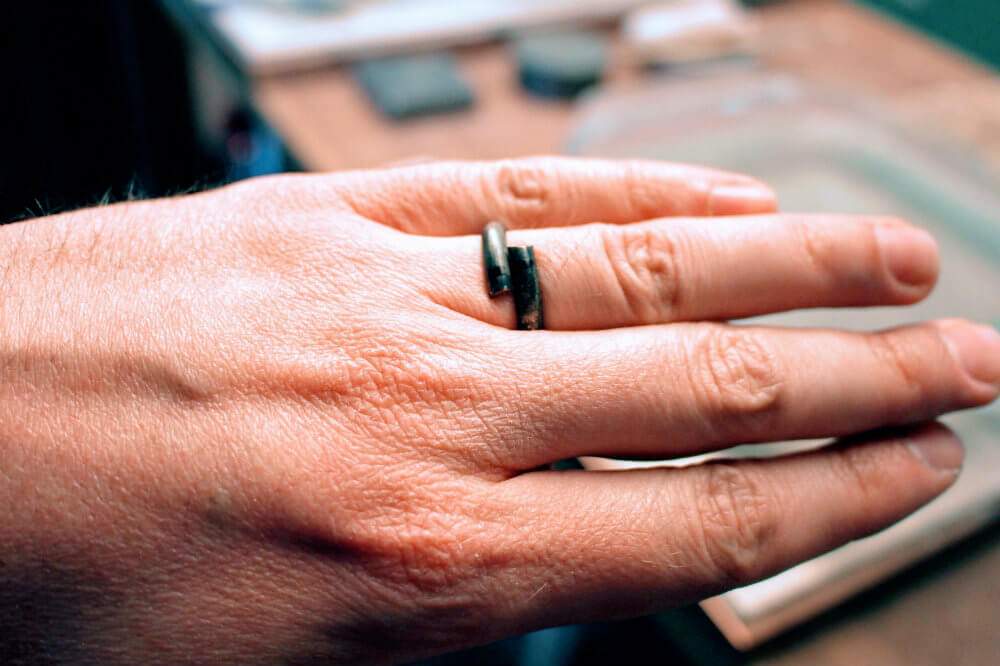
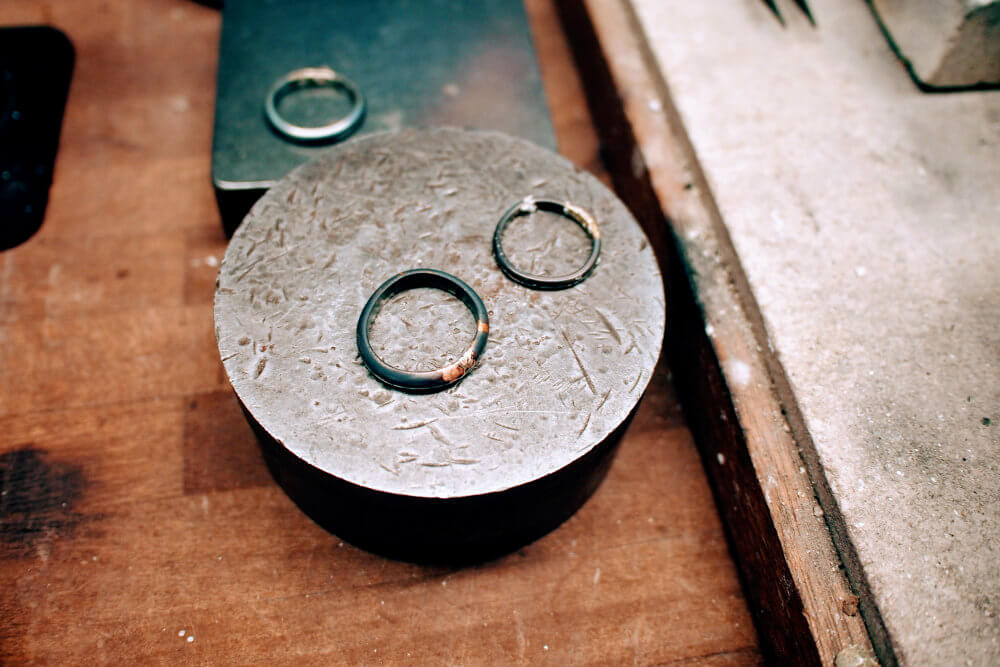
The pickling pot had worked its magic over the lunch period, making them unrecognisable. What were once black rings now resembled something more akin to roman gold that you might find on display in a museum. They were certainly more gold in colour, though the shape was still a little unrefined and wobbly.
In order to make our wedding rings look more ‘ring shaped’, we placed them within some circular moulds and did some further hammering to work out of the kinks. It didn't take long before we had two perfectly circular rings.
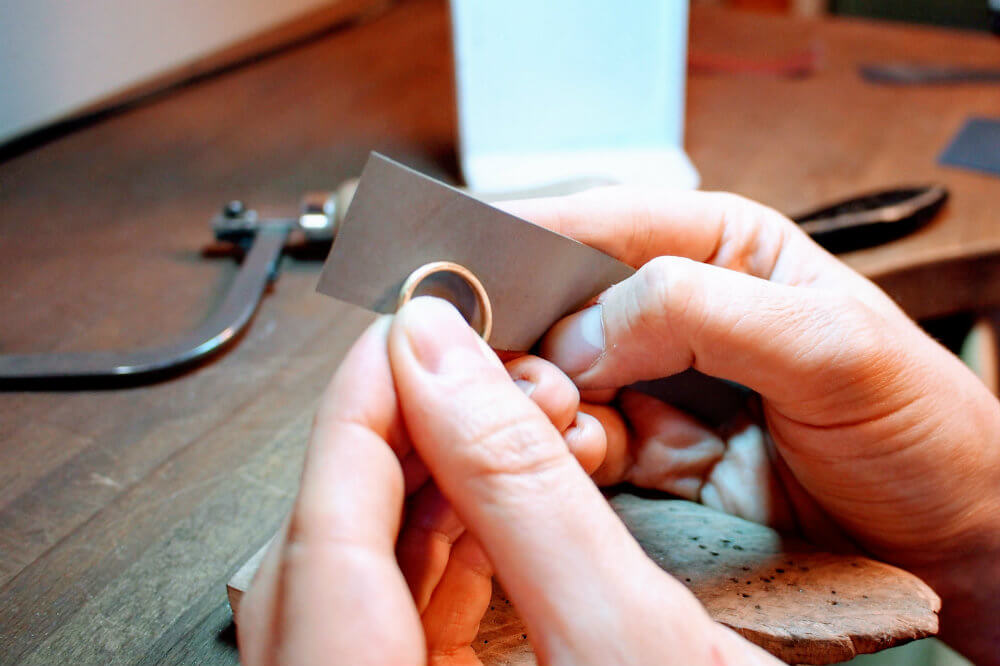
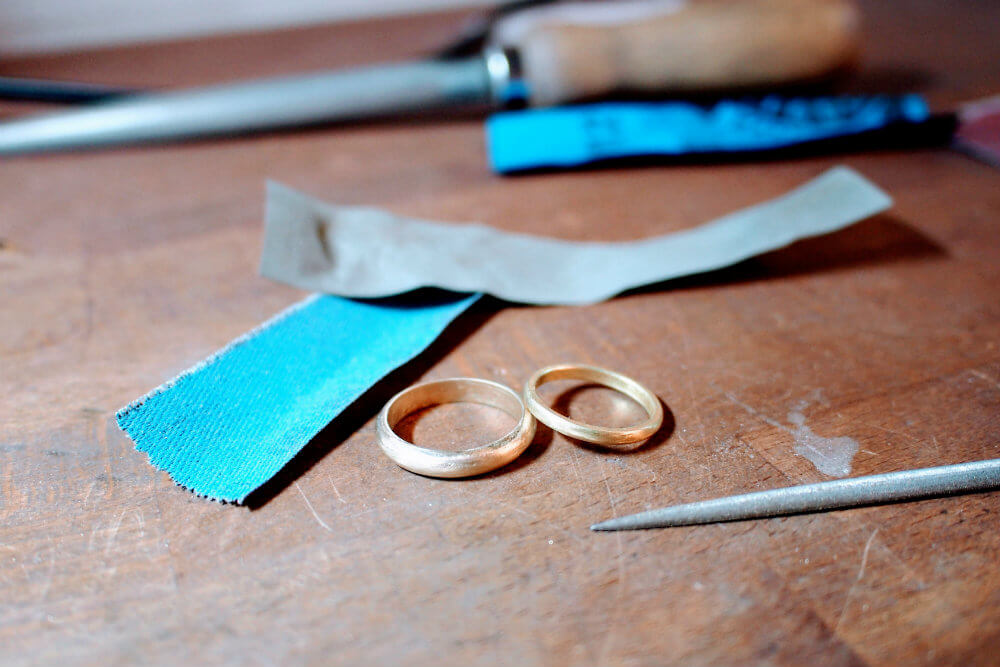
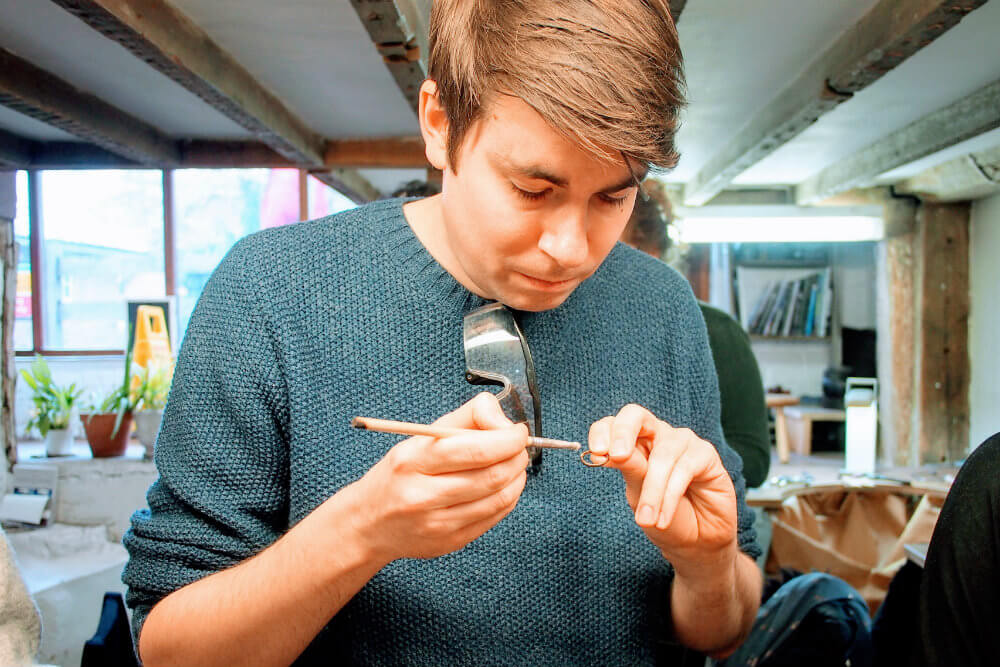
Step 7: Sanding & Filing
Following this, we then proceeded to do some sanding and filing around the join in the ring, smoothing it down in the hope we'd make it disappear.
After this, we used three grades of sandpaper to smooth out every surface and to bring out the gold's natural shimmer. The joins were no longer visible, even under magnifying glasses and I wondered whether we’d have a tough time convincing people that we made them ourselves!

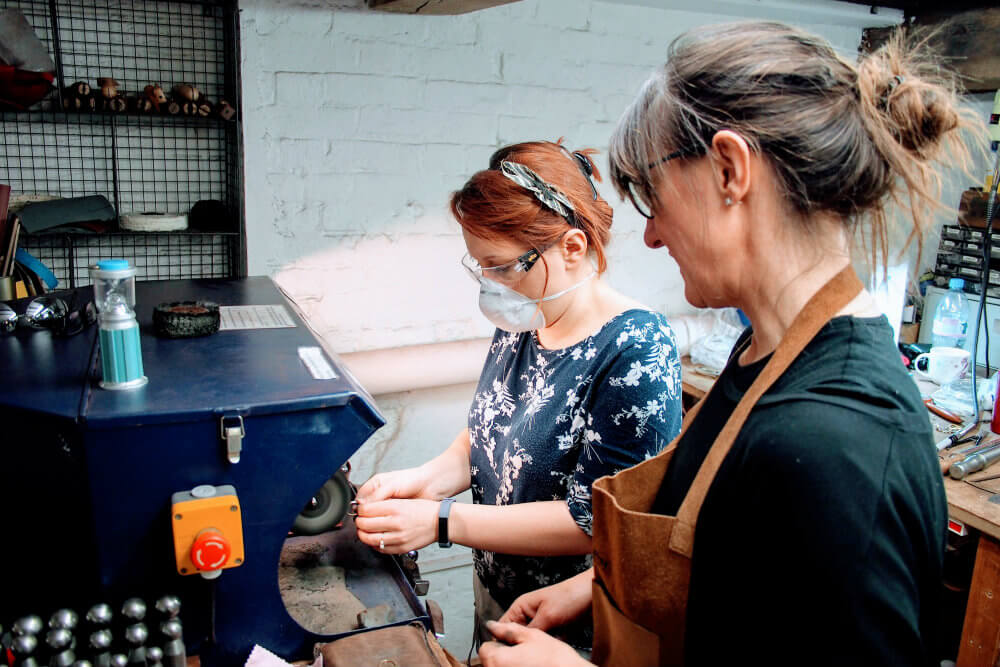
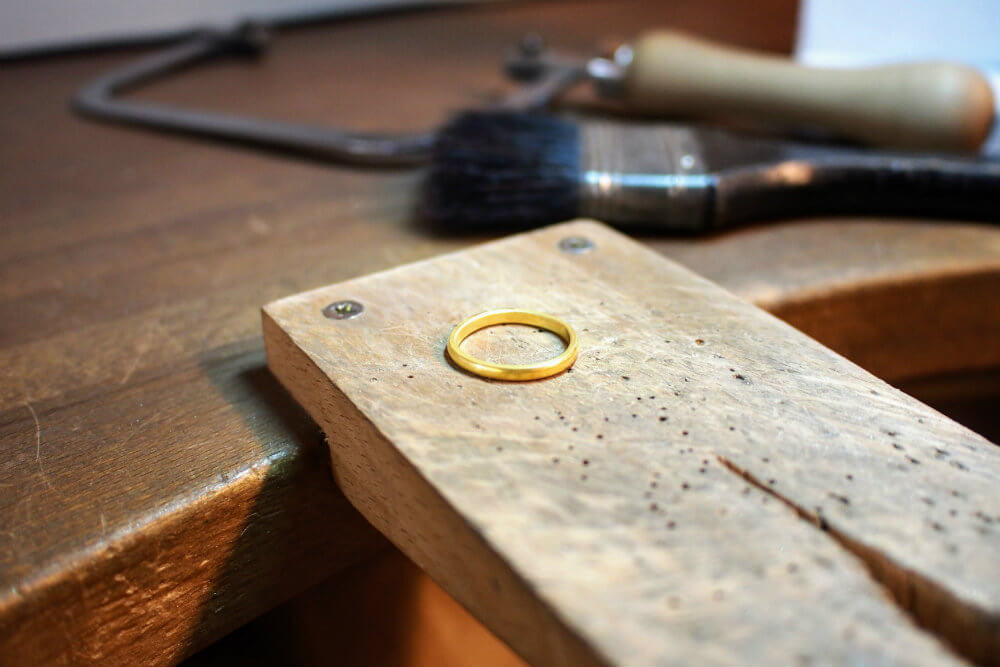
Step 8: Polishing
Last but not least, we got to use some heavy machinery. We got to buff and polish our rings- both the inside and outsides of the ring. The result was two spectacular gleaming rings.
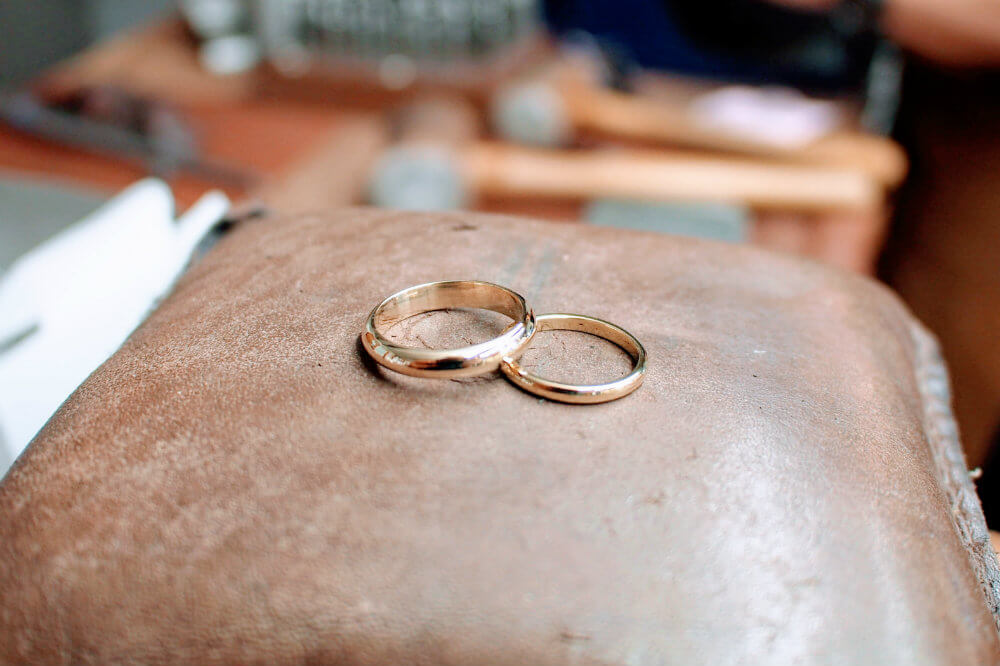
All Done!
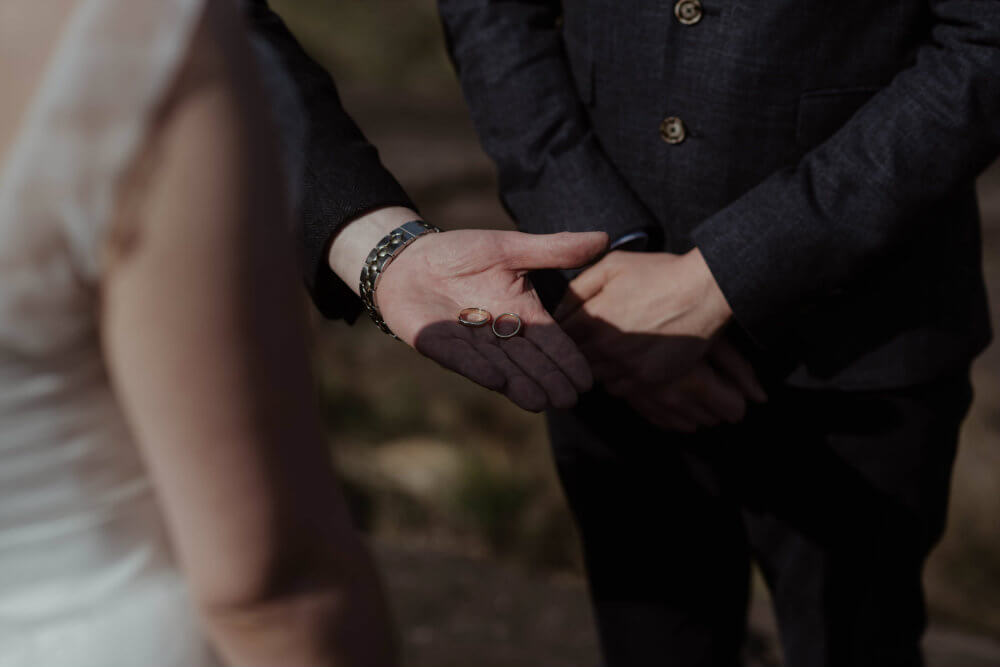
After posing with our rings and feeling enormously proud of what we had achieved, we then unfortunately had to relinquish our rings. Hallmarking the rings could only be done in London, so they had to be sent off. It was like parting with our babies!
We celebrated our achievement and simultaneously mourned our loss with some further treats from Charlie’s before we headed home.
After a few weeks, we headed back to Wheathampstead to collect our hallmarked rings. We were very excited, as well as relieved to finally have them in our hands. It wasn't long before the big day. Under a magnifying glass, we could clearly make out the hallmarking, which included the initials of the Rachel Jeffrey Jewellery School. Lasting proof that we handcrafted our wedding rings!
Reflections on Making Our Own Wedding Rings
Making our wedding rings was such an enjoyable experience that we would recommend to everyone. A ring is often given symbolically during the wedding ceremony as a symbol and representation of love and commitment for one another. Making our own wedding rings felt even more symbolic, as our rings were made with love by and for one another.
Making each other's wedding rings was a process that required a great deal of trust, communication, thoughtfulness and perseverance. It could probably make a great substitute for marriage preparation classes! Despite neither of us being crafty or the kind of people familiar with a toolkit, we had a really fun day, in which we felt a great sense of achievement and ended up with two beautiful rings to boot!
What more could you ask for?!
Why We Decided to Make Our Own Wedding Rings
Getting to the point where we were actually making our own wedding rings felt like a long process. We’d been to wedding fairs, visited some high street jewellery shops and even had a home visit from a jewellery company. We'd tried on so many rings!
They were all perfectly fine, but something didn’t quite sit right. We really wanted all of the aspects of our elopement to fit with our values - to be ethical, personal and to be good value for money.
That’s when I came across the idea of making our own wedding rings. Suddenly, all of the boxes where ticked!
How We Chose Our Wedding Ring Workshop
When we started searching, we discovered so many companies offering workshops on making your own wedding rings across the country. Many of them offered rather fancy packages, including exclusivity of the premises and extra embellishments that could be added to your rings (such as plating and engraving).
In the end we chose Rachel Jeffery Jewellery School, as not only was it the closest workshop to us, but Rachel and her colleagues were helpful and friendly in their correspondence and their offering was great value for money.
Rather than offering a fancy package tailored exclusively to engaged couples, Rachel's workshop catered to anyone looking to make rings and bangles, with classes of up to 8 people (or 4 couples). This made it much more affordable and accessible. We all know how much more expensive something is when 'weddings' are mentioned.

Our Advice For When You Chose To Make Your Own Wedding Rings
When shopping around for workshops yourself, be sure to ask the following questions so that you have a better sense of what is and isn’t included. This should help with your decision making process.
Questions You Should Ask
- What do you charge for the raw cost of materials? Some workshops helpfully break this down into estimated costs based on type of material and width of band based on an average ring size
- Is cost of hallmarking included in the price?
- Is the advertised price just the cost of the workshop? Does it include metals (silver is sometimes included in the price)
- How long will hallmarking take?
- What availability do they have for workshops? Is a weekend workshop more expensive than weekday?
- What is the ratio of instructors to workshop attendees?
- Are food/drinks/snacks included? What locals options are there if you are to provide your own?
- What metals/ band shape/widths do they have available?
Recycling Existing Jewellery
Some companies offer options to recycle your existing jewellery, but there may be an extra cost for them to melt your jewellery and mold into a workable metal bar. If recycling is important to you, always ask whether it's available. Additionally, you should ask whether it's actually feasible, as you may not have enough metal and the quality may not be up to scratch.
Ethical Jewellery
We recommend asking workshops about how their metals are sourced. Are workers paid fairly throughout the chain and are their working conditions safe and humane? Does the mining company have a strict environmental policy? What about sustainability?
The more that people ask these types of questions, the more the jewellery industry will need to take note and change its procedures to meet consumer expectations, for the benefit of everyone.
Final Advice - Book a Consultation
Our final piece of advice is to book a consultation before booking a workshop so that you can explore your ideas and the available options. This could also allow you to try on a range of samples to find the right match for you.
This can be especially important if you’re looking to match your wedding ring to your engagement ring. Plus, if you have a non-jewellery-wearing partner, it'll give them an opportunity get used to the idea of wearing jewellery and what their options might be.
Finally, just have fun! When is it likely you'll ever be going through this process again? Probably, never!
If you do end up making your own wedding rings and this post helped to inspire you, please let us know all about your experience in the comments below. We'd love to hear all about it!
[htt-pinterest-img src="https://heretotravel.com/wp-content/uploads/2018/11/wedding-rings-pinterest.jpg" title="Make Your Own Wedding Rings: Our Experience at a Jewellery Workshop"]